 Niwa
NiwaHow to plan a vegetable garden layout
Most failed vegetable gardens were lost in March, on paper. Here is the order to make the decisions in, and the four mistakes that cost people a harvest before they plant anything.
A vegetable garden layout is not a drawing exercise. It is a sequence of five constraints (space, sun, spacing, height and access) resolved in that order. Resolve them out of order and you get the classic first-year garden: sixteen tomato plants crammed into eight square feet, a courgette that ate the path, and lettuce cooking in full August sun.
This guide walks the sequence. It takes about forty-five minutes on paper, or roughly ten minutes if you let an app do the spacing arithmetic.
Step 1: Fix your bed size first
Four feet wide is the rule, and it is not aesthetic. The average adult has a comfortable reach of about two feet. A bed wider than four feet forces you to step onto the soil to reach the middle, and compacted soil loses the pore structure roots need. Every problem in a five-foot bed traces back to that one decision.
Length is flexible (6ft, 8ft, 10ft), but 4ft by 8ft has become the default for a reason: it is 32 square feet, it is buildable from standard lumber with two cuts, and it is small enough that a beginner finishes it.
If you are working an in-ground plot rather than raised beds, divide it into 4ft-wide strips separated by paths. Same logic, no lumber.
Step 2: Map the sun before you pick anything
Spend one clear day photographing the space at 9am, noon, 3pm and 6pm. You are looking for which parts of the plot get six or more hours of direct sun, because that number sorts your entire crop list:
| Daily direct sun | What it will grow |
|---|---|
| 8+ hours | Tomatoes, peppers, aubergine, squash, melons, corn, basil |
| 6-8 hours | Beans, cucumbers, carrots, beets, onions, most herbs |
| 4-6 hours | Lettuce, spinach, chard, kale, radish, peas, mint |
| Under 4 hours | Nothing productive. Move the bed. |
People routinely overestimate their sun by two hours. If you are guessing, subtract one hour from your guess and plan against that.
Step 3: Choose crops you will actually eat
Write down what your household ate last week. That is your crop list. The most common first-year regret is not a failed plant, it is eleven kilos of courgette nobody wanted.
Then apply the value filter. Some crops are worth their square footage and some are not:
- High value per square foot: cherry tomatoes, salad leaves, herbs, spring onions, mangetout, chillies. Expensive in shops, cheap and prolific in a bed.
- Poor value per square foot: maincrop potatoes, onions, cabbage, sweetcorn. Cheap in shops, and they occupy a square for most of the season.
A 32-square-foot bed realistically holds six to eight different crops. More than that and you are gardening a herb rack.
Step 4: Order by height, north to south
In the northern hemisphere the sun tracks across the southern sky, so anything tall casts its shadow north. Arrange in three bands:
- North edge, tall: trellised tomatoes, climbing beans, peas on netting, sweetcorn.
- Middle, medium: peppers, bush beans, broccoli, kale, beets.
- South edge, low: lettuce, radish, carrots, spring onions, low herbs.
There is one deliberate exception. In a hot climate, planting lettuce in the afternoon shadow of a tall crop buys you weeks of extra harvest before it bolts. That is intentional shade, not accidental shade. The difference is whether you planned it.
Step 5: Apply spacing, square by square
This is where paper plans fall apart, because spacing is per-crop and there are a lot of crops. The square foot method reduces it to four numbers. This is how many plants fit in one square foot:
| Per square | Crops |
|---|---|
| 1 | Tomato, pepper, aubergine, broccoli, cabbage, cauliflower, courgette |
| 4 | Lettuce, chard, basil, kohlrabi, marigold, garlic (larger types) |
| 9 | Bush beans, beets, spinach, turnip, peas |
| 16 | Carrots, radish, onions, spring onions |
Full chart, including how to handle sprawlers that spill over several squares, is in the square foot gardening spacing chart.
Step 6: Check for combative neighbours
Before the layout is final, scan adjacent squares for the pairings that genuinely reduce yield. There are fewer of them than Pinterest suggests, but the real ones matter:
- Fennel: allelopathic to most vegetables. Give it its own container, away from the bed.
- Alliums next to beans and peas: onions, garlic and chives suppress the rhizobia bacteria legumes depend on for nitrogen fixing.
- Tomatoes next to potatoes: same family, and blight moves between them freely.
- Brassicas next to tomatoes: heavy feeders competing for the same nutrients in the same window.
The full list, and the myths you can ignore, is in what not to plant together.
Step 7: Leave real paths
Eighteen inches minimum between beds; two feet if you use a wheelbarrow. It feels wasteful when you are drawing it and it feels essential in July, when the bed is full, you are carrying a harvest basket, and the alternative is treading on your carrots.
Four mistakes that cost a harvest
- Planning by area, not by season. A bed has two or three harvests in it, not one. Spinach out in June is a bean square in July. If your layout has only one state, you are using about half your bed.
- Ignoring days to harvest. A crop needing 110 days in a 150-day season leaves no room for a follow-on. Check the number before you commit the square.
- Planting the whole square of lettuce at once. Sixteen lettuces all ready in the same week is not a harvest, it is a problem. Sow a quarter-square every fortnight instead.
- Forgetting last year. Tomatoes in the same square three seasons running builds up soil-borne disease. Rotate by plant family, and write down what went where.
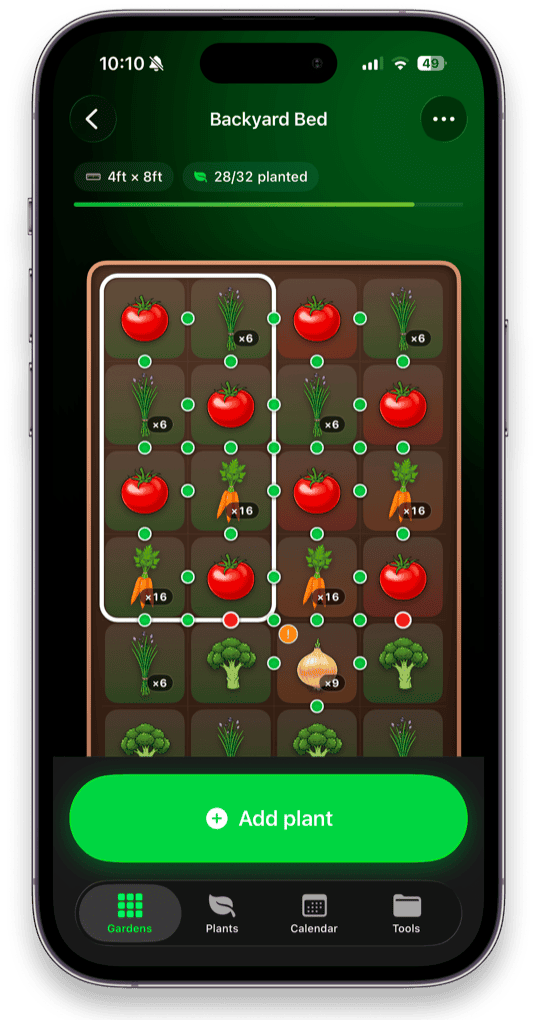
Doing all of this in Niwa
Steps 5 and 6 are the ones that make people abandon a paper plan. They involve looking up two hundred spacing figures and cross-referencing every neighbouring pair. That is exactly the part a phone should do.
Once the layout exists it is a living document rather than a drawing: as squares free up through the season, Niwa still knows what grew there, what is safe to follow it, and how many days are left before your first frost.